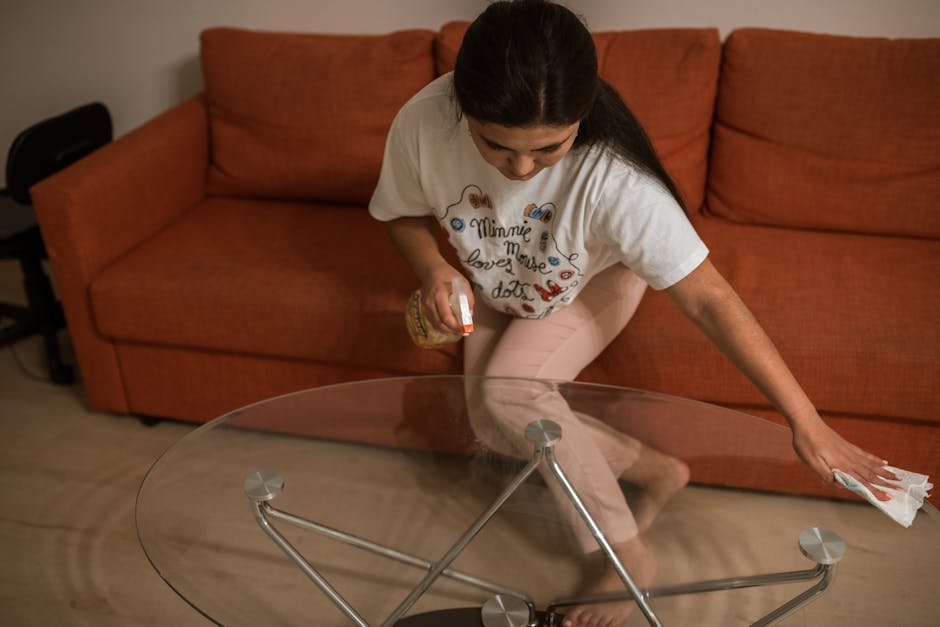
Step by step upholstery cleaning guide for stubborn stains
Spilled tea on the sofa? Mud from a school run? A mystery mark that appeared after one busy Sunday afternoon? You are not the first person to stare at an upholstery stain and wonder if the furniture is now ruined. The good news is that many stubborn stains can be tackled safely at home if you work methodically, use the right cleaning solution, and do not rush the drying. This step by step upholstery cleaning guide for stubborn stains walks you through what to do, what to avoid, and when it is wiser to stop and call in a professional. If you want a deeper service overview later, you can also look at upholstery cleaning or broader care options such as sofa cleaning.
The aim here is simple: help you remove the stain without spreading it, damaging the fabric, or turning a small problem into a bigger one. Truth be told, most upholstery disasters get worse because people scrub too hard or use the wrong product first. Let's fix that.
Table of Contents
- Why this guide matters
- How upholstery stain removal works
- Key benefits and practical advantages
- Who this is for and when it makes sense
- Step-by-step guidance
- Expert tips for better results
- Common mistakes to avoid
- Tools, resources and recommendations
- Law, compliance, standards and best practice
- Options, methods and comparison table
- Case study or real-world example
- Practical checklist
- Conclusion
- Frequently asked questions
Why this guide matters
Upholstery is not like a hard floor. Fabric absorbs liquid, holds onto oils, and can trap residue deep in the fibres. That is why a stain on a sofa arm or dining chair can look small on the surface but still leave a shadow after drying. A sensible, step by step approach matters because it reduces the chance of pushing the stain deeper or bleaching the material.
It also matters for fabric life. Repeated over-wetting, aggressive scrubbing, and harsh chemicals can flatten fibres and make the affected area look worn even if the stain comes out. You might remove the mark but leave behind a patch that looks darker, rougher, or oddly shiny. Not ideal. A careful cleaning routine protects both appearance and texture.
There is also a practical side. Many stains become harder to remove the longer they sit. Fresh coffee is one thing; coffee that has dried through three cushions and a hot afternoon is something else entirely. Acting in the right order gives you the best chance of success. And if the stain is from food grease, makeup, pet mess, or ink, the cleaning logic changes a bit, which is why a generic rub-and-hope method usually disappoints.
Expert summary: The best upholstery stain removal is not about using the strongest product. It is about identifying the fabric, choosing a safe cleaner, blotting instead of scrubbing, and drying the area properly.
How upholstery stain removal works
Most stubborn stains on upholstery can be broken down into four broad types: water-based stains, oily stains, protein-based stains, and dye or pigment stains. Each reacts differently to cleaning. Water-based marks like tea, squash, or diluted drinks often respond to a mild detergent solution. Oily stains need a product that can lift grease. Protein-based stains from things like milk or food residue need careful treatment so they do not set. Dye stains, such as ink or some sauces, are tougher and may require specialist cleaning.
The process works by loosening the stain, lifting it from the fibres, and removing residue before it dries again. That is why blotting matters so much. Pressing a clean cloth into the stain transfers liquid upward. Scrubbing, by contrast, pushes the spill around and can roughen the weave. A little patience goes a long way here, honestly.
Fabric type matters just as much as stain type. Cotton blends, linen, polyester, velvet, chenille, wool mixes, and microfiber all behave differently. Some can handle a damp clean; others need very little moisture. If the upholstery has a manufacturer care label, use it. W, S, WS, or X codes usually tell you whether water-based cleaning, solvent-based cleaning, both, or vacuum-only care is suitable. If that label is missing, treat the item cautiously and test every solution first.
At home, stain removal is usually a controlled spot-cleaning process. Professional cleaning goes further by using inspection, targeted chemistry, and extraction methods that remove residue more deeply. If your sofa has multiple stains, lingering odours, or a worn look overall, it may be better to consider a dedicated deep-cleaning service rather than spot-treating the same patch again and again.
Key benefits and practical advantages
When you clean upholstery the right way, the benefits are bigger than a nice-looking sofa. For one thing, you preserve the furniture you already own, which is usually far cheaper than replacing it. A clean armchair or sofa also makes the whole room feel fresher. You notice it immediately when you walk in, especially in a living room that gets daily use.
There is a hygiene angle too. Upholstery can hold onto crumbs, skin oils, pet dander, and general household dust. Stains are often the visible sign of a deeper buildup. A careful clean helps reduce that residue and can make seating more pleasant for family and guests. If you run a business or manage a shared space, the same logic applies, which is why office cleaning and upholstery care often go hand in hand.
Another advantage is confidence. Once you understand what you are doing, you can deal with spills sooner and more calmly. That matters. A lot of people panic, reach for the nearest spray bottle, and make the job harder. With a repeatable system, you know how to respond the next time a glass tips over or a child drops chocolate on the arm of the sofa. Not glamorous, but real life.
Finally, proper cleaning helps maintain resale or rental value. In a furnished rental, upholstery condition can strongly affect first impressions. For landlords or tenants preparing a property, furniture care sits naturally alongside end-of-tenancy cleaning, especially when the upholstery is part of the inventory.
Who this is for and when it makes sense
This guide is for anyone dealing with a visible stain on a sofa, armchair, dining chair, ottoman, footstool, or fabric headboard. It is especially useful if the stain is recent, the fabric seems delicate, or you are trying to decide whether to clean it yourself or book help. If you are renting, juggling family life, or trying to refresh a home before visitors arrive, a step-by-step method can save time and stress.
It also makes sense for people who have tried a few things already and now need to avoid making the mark worse. There is a point where the stain stops being the main issue and the surrounding patch becomes the problem. Maybe the spot has a tide line, maybe the fabric feels stiff, maybe the colour has shifted slightly. That is when a cautious approach matters most.
If you are cleaning after home renovations, dust and paint flecks can mix with fabric oils and make marks look more stubborn than they are. In those cases, upholstery care often sits alongside after builders cleaning, because the furniture may have picked up dust from the rest of the property too.
This guide may not be enough if the upholstery is antique, silk, heavily watermarked, badly bleached, or already damaged. It may also be too little if the sofa smells strongly of urine, has deep-set pet accidents, or the stain has been treated with multiple unknown products. In those situations, a professional inspection is usually the safest next move.
Step-by-step guidance
Below is a practical method you can follow at home. Keep it calm and simple. You do not need to attack the stain; you need to understand it.
1. Check the care label and the fabric
Before you touch the stain, look for the care code. If the label says water-safe, you have more flexibility. If it says solvent-only, avoid soaking the area. If there is no label, treat the fabric as delicate and test everything first on a hidden section, such as the back edge or under a cushion flap.
Also look closely at the weave. Is it tightly woven or loose? Is it textured, brushed, or velvety? Loose and raised fibres can mat down quickly if overworked. That little glance saves headaches later.
2. Remove loose debris gently
Use a vacuum with a clean upholstery attachment to lift crumbs, dust, and grit around the stain. If there are solid bits on the surface, pick them up with a spoon or dry cloth first. Do not rub them in. Small debris can act like sandpaper when you start blotting.
3. Identify the stain type
Ask yourself what likely caused it. Tea, coffee, juice, and sauce usually fall into the water-based camp. Oil, butter, makeup, and body cream are greasy. Blood and milk are protein-based. Ink, coloured drink syrups, and some food dyes are tougher. If you do not know the source, begin with the mildest safe cleaner and work gradually.
4. Make a safe cleaning solution
For many common stains, a small bowl of lukewarm water with a few drops of mild washing-up liquid is enough to start. The mixture should be faintly soapy, not bubbly. For solvent-safe fabrics, a suitable upholstery-safe solvent may be needed instead, but only if the care label supports it. Do not guess with strong chemicals.
If the stain is greasy, some people add a tiny amount of white vinegar to water, but it is wise to test first. Vinegar is not magical. It helps in some situations and does very little in others.
5. Blot from the outside in
Dampen a clean white cloth or plain microfiber cloth. Work from the outer edge of the stain towards the middle. This helps prevent the mark spreading. Press, lift, and repeat. Use controlled pressure. The stain may fade in stages rather than all at once, which is normal. Do not rush this part.
6. Use a second cloth with clean water
Once the stain starts lifting, use another cloth dampened with clean water to remove any detergent residue. Leftover soap can attract dirt later and leave the area looking patchy. This step is easy to skip when you are impatient, but it makes a difference.
7. Repeat carefully if needed
Stubborn stains often need two or three gentle passes rather than one aggressive one. Let the fabric rest between rounds if it starts to feel too damp. If the stain is improving slowly, stay with it. If nothing changes after a few careful attempts, stop and reassess instead of escalating straight away.
8. Dry the area properly
Pat the spot with a dry towel to remove excess moisture. Then air-dry it with ventilation. A fan can help, as can opening a window on a dry day. Avoid direct heat from a hairdryer unless you are absolutely sure the fabric can handle it. Heat can set some stains and distort sensitive fibres. In a chilly UK living room, this can take time, so be patient.
9. Re-fluff and check for residue
When the area is fully dry, gently brush the fibres if suitable for the fabric, or simply run your hand lightly over the surface. Check whether a shadow remains. Sometimes the stain itself is gone but the edge still needs a light second treatment. If there is a smell or a visible ring, you may need a deeper clean.
For large sofas or repeated marks, a specialist service such as carpet cleaning is not directly the same thing, of course, but many people choose it alongside upholstery care when the home needs a broader reset. The bigger picture matters.
Expert tips for better results
Use white cloths whenever possible. Coloured towels can transfer dye, especially when damp. It sounds fussy, but nobody enjoys discovering a faint blue patch where there used to be a tea stain. Been there, seen that, not fun.
Work with the grain or nap of the fabric where it exists. On textured or brushed upholstery, following the natural direction of the fibres gives a cleaner finish and reduces matting. If you are unsure which way the pile runs, look at the fabric from different angles in the light. Morning light from a window can be especially helpful.
Keep your cleaning solution light. More product does not mean more cleaning power. Excess detergent is one of the biggest reasons upholstery ends up with sticky residue and fast re-soiling. If the cloth feels sudsy for too long, you probably used too much.
For food and drink stains, treat the area as soon as you can. Fresh marks are always easier. For older stains, let the solution sit on the cloth, not on the fabric, unless you know the upholstery can tolerate a little dwell time. Small detail, big difference.
If the stain is on a cushion that is removable, clean the cushion cover and the surrounding seat area together. Otherwise you can end up with a bright clean square in the middle of a duller seat. The eye catches that instantly.
If you are dealing with a heavily used family sofa, consider a monthly maintenance routine rather than waiting for disasters. Light vacuuming, quick spot checks, and occasional professional support can keep the fabric looking better for longer. A little boring, maybe. Very effective, definitely.
Common mistakes to avoid
The biggest mistake is scrubbing. It feels like action, but it usually spreads the stain and damages the pile. Blotting is slower, yes, but much safer.
Another common error is using too much water. Upholstery is not a bath towel. If you soak it, you can create water marks, mildew risks, or damage to internal foam and padding. The surface may dry, while the inner layers stay damp longer than you think.
People also make trouble by mixing products. Combining cleaners can create residue, odd smells, or worse. Stick to one method at a time and rinse between attempts if needed.
Do not use coloured kitchen cloths, old cleaning sprays of unknown origin, or rough scrub pads. They might seem harmless. They are not.
Finally, do not ignore the test patch. Even a fabric that seems robust can react badly to cleaning agents. If a hidden spot changes colour, stops feeling soft, or goes shiny, stop immediately. Better a tiny test failure than a whole sofa problem.
Tools, resources and recommendations
You do not need a shed full of specialist gear to clean upholstery properly. A sensible starter kit is enough for most household stains.
- White microfibre cloths or plain absorbent cloths
- A vacuum cleaner with upholstery attachment
- A small bowl for mixing solution
- Mild washing-up liquid
- Clean lukewarm water
- A soft brush for suitable fabrics
- Dry towels for final blotting
- A fan or good airflow for drying
If you prefer to buy one tool that does a lot of the heavy lifting, an upholstery-safe cleaning machine can be useful for larger jobs, though it is not essential for every stain. If you are comparing home equipment with a professional service, the main difference is not just the machine but the operator's judgement. That matters more than people think.
For recurring stains on chairs, sofas, or upholstered dining seats, look at the whole home routine as well. Regular domestic cleaning keeps dust and surface grime from settling into fabric, and that can make stain treatment easier when spills happen.
If you are planning a one-off refresh before guests arrive or before a tenancy inspection, a one-off cleaning visit may make more sense than buying multiple products you will rarely use again.
Law, compliance, standards and best practice
For most homeowners, upholstery cleaning is a practical housekeeping task rather than a regulated process. Still, best practice matters because cleaning products can affect safety, surfaces, and indoor air quality. In the UK, a sensible approach is to follow manufacturer care labels, use products according to their instructions, and keep strong cleaners away from children and pets. That may sound obvious, but in a rush it gets overlooked.
If you clean for customers, tenants, or a business premises, you also need to think about safe handling of chemicals, good ventilation, and avoiding damage to property. Many cleaning firms document their procedures through internal safety policies and insurance arrangements. If you are comparing providers, it is reasonable to look for clear information about health and safety policy and insurance and safety, because those pages usually give a better sense of how carefully a company works.
For end-of-tenancy situations, the practical standard is usually condition and cleanliness rather than a legal promise that every mark must vanish. Fabric age, wear, and previous damage all matter. A stain that has set for months may not come out completely, even with good treatment. It is better to be honest about that than to promise miracles.
Responsible disposal matters too. If you use disposable cloths or empty packaging, sort waste sensibly and follow local recycling guidance where possible. Some companies also publish information about sustainability practices, and that is worth checking if you care about environmental impact. It is not the headline issue, but it is part of doing the job properly.
Options, methods and comparison table
Not every stain needs the same approach. Here is a simple comparison to help you decide what to try first.
| Method | Best for | Pros | Risks |
|---|---|---|---|
| Mild detergent and water | Tea, coffee, light food spills, general marks | Easy, inexpensive, usually fabric-safe when tested | Can over-wet the fabric if used heavily |
| Solvent-safe spot treatment | Grease, makeup, oily residue | Targets oil-based stains more effectively | Not suitable for all fabrics; testing is essential |
| Repeat blotting and rinse cycles | Old or stubborn water-based stains | Gradual and controlled, less damaging than scrubbing | Takes time and patience |
| Professional upholstery cleaning | Deep stains, odours, delicate fabrics, large areas | Better equipment, deeper extraction, expert judgement | Cost is higher than DIY |
If your upholstery is part of a wider set of soft furnishings, it can help to think in terms of the whole room. A stain on a sofa next to a marked rug or dusty curtains may make the furniture feel worse than it is. In that case, combining upholstery treatment with rug cleaning or window cleaning can lift the room visually more than tackling one item alone. Funny how that works.
Case study or real-world example
A fairly typical job starts with a family sofa and a coffee spill on a Friday evening. By Saturday morning, the stain has dried into a pale brown patch with a darker edge. The fabric is a polyester blend, and the care label allows water-based cleaning. The first pass uses a mild detergent solution and careful blotting with a white cloth. The stain lightens but does not disappear completely.
After the fabric dries for a while, a second pass is done with clean water to lift residue. The dark ring reduces. The key difference is that the cleaner works slowly and avoids saturating the seam. A small fan helps the cushion dry over the next few hours. By late afternoon, the mark is no longer the first thing the eye sees. It is faint, and in normal light it blends much better with the surrounding fabric.
Now, if that same sofa had been velvet, or if the stain had been red wine left for days, the outcome might have been very different. That is the honest bit. Some jobs are satisfying DIY wins. Others are better left to a professional because the risk of damage is simply too high. There is no shame in that.
For busy households, it is often the repeated little mishaps rather than one big disaster that lead people to book help. At that point, a trained cleaner can save time and reduce trial-and-error, especially if the upholstery needs more than a spot clean.
Practical checklist
Use this quick checklist before you start.
- Identify the stain as best you can
- Check the upholstery care label
- Vacuum loose dirt and crumbs first
- Test the cleaner on a hidden area
- Use a white cloth and blot gently
- Work from the outside of the stain inward
- Rinse lightly with clean water if needed
- Avoid soaking seams and cushion edges
- Dry the area fully with good airflow
- Check for rings, residue, or odour once dry
If you can tick every box, you are already ahead of most people who start with a random spray and a bit of hope.
Conclusion
Stubborn upholstery stains look frustrating, but they are usually more manageable when you break the job into calm, sensible steps. Check the fabric, identify the stain, test your cleaner, blot rather than scrub, and dry the area properly. That sequence is what protects the upholstery and gives you the best chance of a clean finish.
The real skill is restraint. Not every stain needs force. Some just need a better method, a little patience, and the confidence to stop before you do harm. If the stain is old, the fabric is delicate, or the sofa has already been treated a few times with no success, a professional clean can be the smarter route.
And if you are weighing up whether to clean it yourself or bring in help, remember that a clean sofa does more than look neat. It changes how a room feels. Softer, fresher, calmer. That counts.
Get a free quote today and see how much you can save.
Frequently Asked Questions
What is the safest way to clean a stubborn stain on upholstery?
The safest method is usually to vacuum first, test a mild cleaner on a hidden spot, then blot the stain gently with a damp cloth. Avoid soaking the fabric or scrubbing hard.
Can I use washing-up liquid on sofa stains?
Yes, in small amounts and only when diluted. A tiny drop in lukewarm water is often enough for many water-based stains, but always test first and rinse afterwards to avoid residue.
How do I know if my upholstery is water-safe?
Look for the manufacturer care label. If it has a water-based cleaning code, you can usually use a damp-cleaning method. If the label is missing, treat the fabric as delicate and test carefully.
What should I do if the stain is greasy?
Greasy stains often need a product that can lift oil rather than plain water alone. Start with the safest upholstery-appropriate method for that fabric and avoid over-wetting the area.
Why does a stain sometimes come back after cleaning?
That usually happens when residue is left behind or when the stain has travelled back up through the fibres as the fabric dries. Rinsing lightly and drying thoroughly helps reduce this.
Is it better to blot or scrub upholstery stains?
Blotting is far better. Scrubbing can spread the stain, damage the fibres, and make the patch look worn. Slow blotting is usually more effective.
Can I use a steam cleaner on upholstery?
Only if the fabric care label and the manufacturer guidance allow it. Heat and moisture can damage some fabrics, so it is not a universal solution.
How long should upholstery take to dry after cleaning?
Drying time depends on the fabric, how much moisture was used, and the room's ventilation. Smaller spots may dry in a few hours, while thicker cushions can take longer.
When should I stop DIY cleaning and call a professional?
Stop if the fabric changes colour, feels stiff, develops a water mark, or if the stain does not improve after a couple of careful attempts. Delicate or antique upholstery is also best left to specialists.
Will professional upholstery cleaning remove every stain?
Not always. Some stains are permanent or have already set into the fibres. A professional cleaner can often improve the appearance significantly, but no honest provider should promise perfection every time.
Can upholstery cleaning help with smells as well as stains?
Yes, sometimes. Removing residue and trapped moisture can reduce odours, especially if the smell is coming from a recent spill. Deep odours usually need a more thorough clean.
How often should upholstery be deep cleaned?
That depends on use, pets, children, and fabric type. Busy family homes usually benefit from periodic cleaning, while lower-use furniture may need less frequent attention.